LISEM Classic
LISEM
Using the model
The LISEM model is integrated into the software. By opening the “Model”-tab, you will see the interface for the model. The LISEM model aims to do local to catchment-scale hydrology, flow, slope stability, slope failure flooding and mass movement runout.
When wanting to run a simulation, the following steps must usually be taken:
- Create a database. Many maps are required to run the model. These can be in any format, but must be of identical size (same number of pixels in each direction). The quality of the data typically determines the quality of model output. Starting with high-quality elevation data can make a huge difference. The chosen study site determines many of the options that need to be used. If the site is a catchment, rainfall might be required. If the site is a river section with urban elements, building cover might be required, as well as incoming river discharge. Buildings need to be selected, as well as a forced boundary condition.
- Select processes. Some processes can only be enabled if others are also enabled (E.g. Slope stability depends on hydrology).
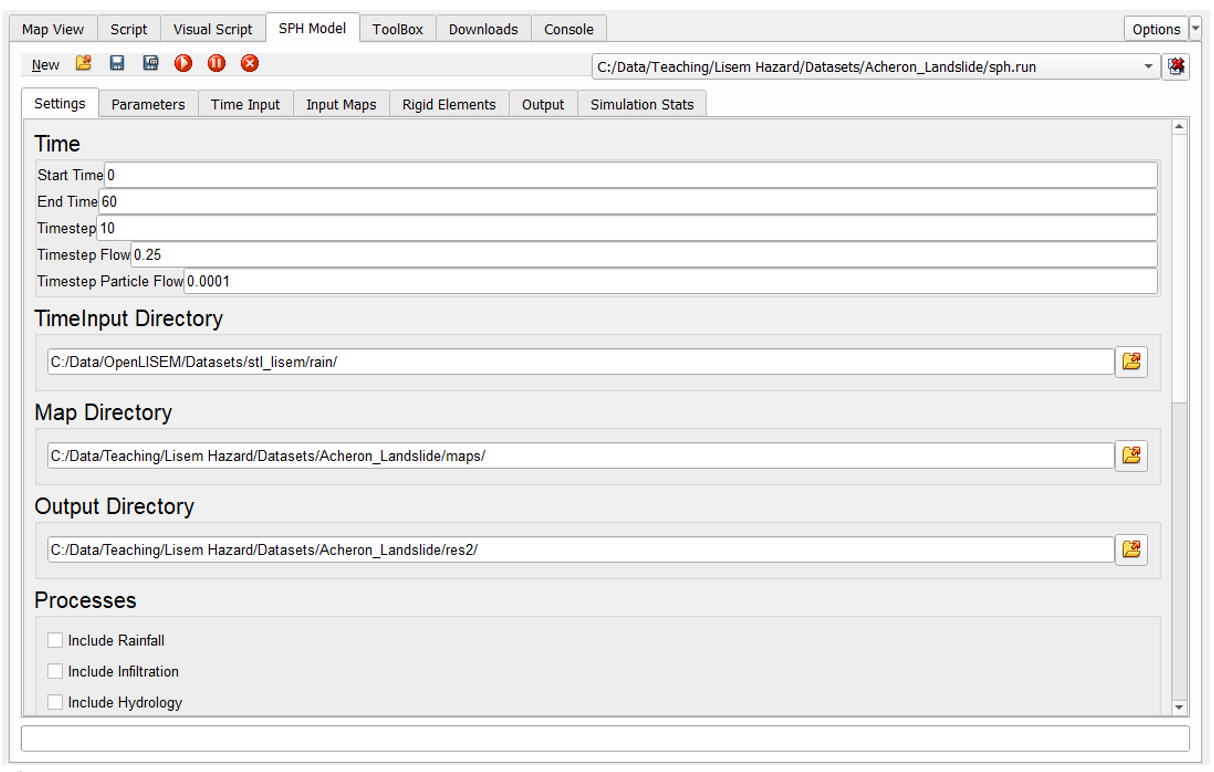
- Provide directories (TimeInput, Map, Output) Output files will be overwritten so be carefull.
- Set simulation time
- Set Time Input (in particular rainfall file, which should exist in the TimeInput Folder).
- Set Map input (These maps should exist in the Map Directory)
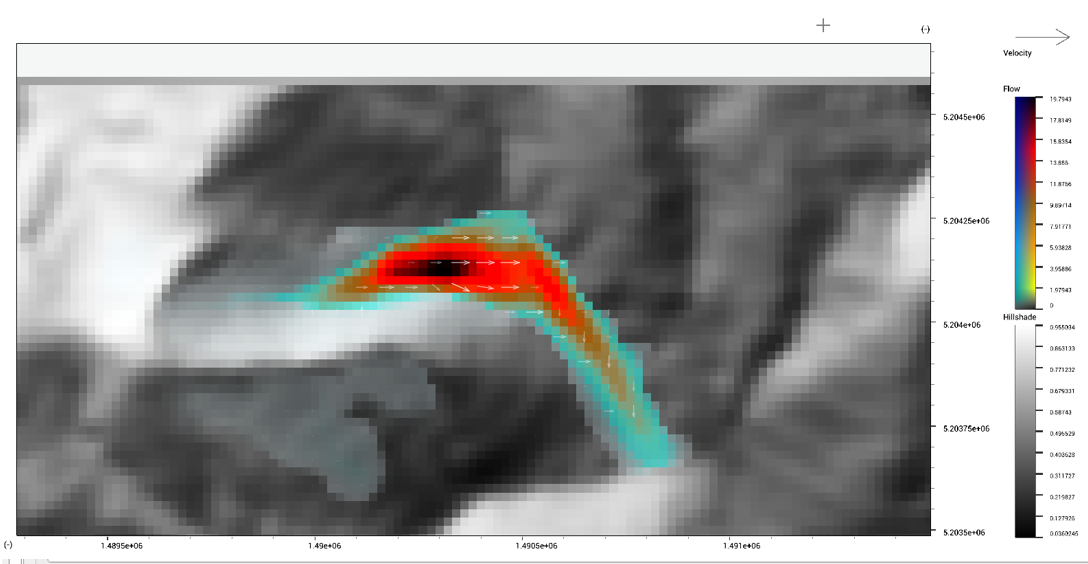
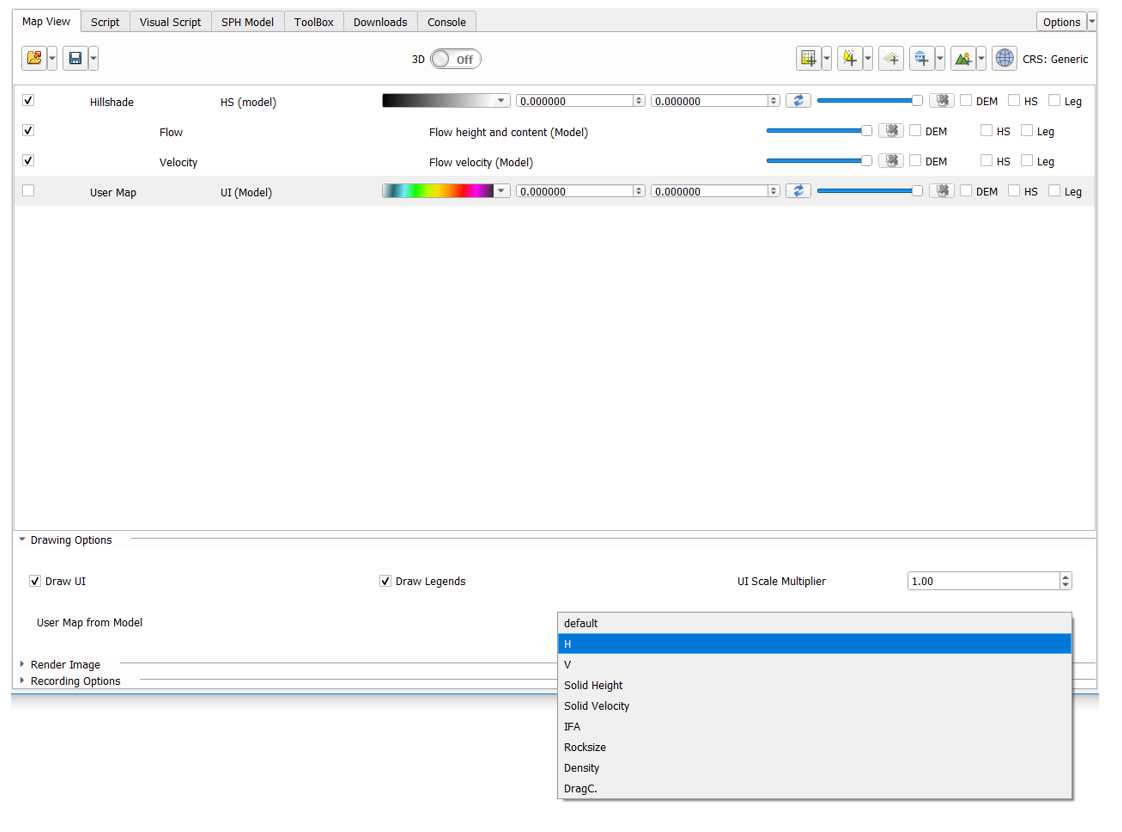
- Run the model! When the model is running, several layers will be added to the map viewer, such as flow height, flow velocity and a hillshaded elevation model. The user-map can be altered to many more model parameters.
These maps can then be viewed to see the model results during the simulation. The model might be stopped at any moment. On each timestep, the output files are updated.